

Here is where you can learn how to set up your new Dusty hammered dulcimer, what safety precautions to take, what sorts of ongoing maintenance you can expect, and how to troubleshoot problems that might come up further down the road.
If you don't find what you're looking for here, you can also try our FAQ page or give us a call!
Inspect the dulcimer: If your new dulcimer was shipped to you, please carefully inspect the instrument for shipping damage. Do not judge this solely by the condition of the shipping box. An impact that is strong enough to cause damage to the dulcimer may have minimal effect on the box. Conversely, a box could look totally destroyed while the dulcimer inside is just fine! Don't stress about hidden damage, though. If something happens during shipping, you'll be able to see it.
If you see anything questionable, take some photos and call us right away. Also, hold onto the box. This is an important responsibility of the new instrument owner. If shipping damage is not reported immediately, neither we nor the shipping company can take any responsibility for repairs or replacement.
Accessories can be hidden: Be sure to locate the tuning wrench, case strap, hammers, and any other accessories you ordered. In order to keep them safe in shipping, accessories are often hidden inside rolls of bubble wrap or paper and can be easy to overlook as just part of the packaging. Sometimes they are also packed in case pockets.
Consider keeping the box: If the shipping box arrived in good enough shape to be used again, consider flattening and storing it. If you ever need to ship the dulcimer in the future or take it on a plane, having the box can be handy.
You can read the terms of the warranty and register you purchase on our warranty page. Registering is not required in order for the warranty to apply, but will make it quicker and easier for us to help you in the event of a warranty claim. Proof of purchase may be required, so be sure to retain your original purchase receipt.
If you're new to this instrument, it might be helpful to have some familiarity with what we call the different parts of the dulcimer.

Though you can set the instrument flat on the floor or on a table, you will notice that tone and volume are expanded if the top edge of the dulcimer is propped up so the back is free to resonate. People commonly play with the dulcimer tilted toward them. Your instrument has a threaded insert built into its back that allows you to attach a playing leg. A short leg props the dulcimer up off a table- top at a comfortable slant. A long leg lets you play while sitting in a chair, with the leg supporting the instrument in front of you and the bottom (long) edge of the instrument resting on your knees. This is a very portable and inexpensive way of supporting the instrument while you play.
Our folding sit-down and stand-up stands provide an alternative that can allow you to leave the dulcimer set up and ready to simply walk up or sit down and play. When unfolding the stand, be sure that the metal peg at the top center point of the stand is securely seated in the corresponding hole. When placing the dulcimer on the stand, make sure that the weight is centered and that the lower edge of the dulcimer is supported by the two upright pegs so that it can't slide off the stand. Though stable on its own, this stand can be vulnerable to being knocked over by pets or small children, so use your best judgment on the location.
If you ordered your dulcimer with the Tristander or Flatstander installed, you can see a demonstration of the setup process below. These sturdy and adjustable support systems are also sold as kits and can be easily added to a dulcimer later on.
If your dulcimer came with dampers installed, we recommend reading this instruction sheet for some tips on setting up the cords and the pedal and adjusting the damper bars to your liking.
If you are already familiar with tuning stringed instruments, you can probably skip this section. If you have never tuned a stringed instrument like this before, it can take some practice, but don't get discouraged! When the dulcimer is brand-new, it takes a lot of frequent tuning, but soon the instrument and the strings will stabilize and you'll be able to go much longer periods of time in between tuning sessions. Keeping the dulcimer in a stable environment (temperature and humidity) will do a lot to keep it in tune.
We recommend using a guitar pick to pluck the strings while tuning. This will give you a crisp, loud sound and allow you to isolate and tune one string at a time. An electronic tuner with a clip-on pickup will also help you to get a good reading, though many people find that tuning apps available for smart phones work just fine.
Use the appropriate string chart for your model to determine the target pitch of the string you are tuning, and then pluck that string with the guitar pick. The electronic tuner will display the pitch it hears, and you’ll need to assess if it’s higher or lower than your target pitch. In the beginning, your strings will mostly be low, or flat. To raise the pitch of a string, set the tuning wrench onto the tuning pin and turn clockwise. Go slowly, and pluck the string as you turn. When the electronic tuner displays the correct pitch and the light turns green or the needle sits on center, then you’re done and can go on to the next string. It doesn’t matter what order you tune the strings in, as long as you can keep track of which ones you’ve done. (Note: The easiest way to break a string is to accidentally be plucking a different string from the one your tuning wrench is turning, which can lead to tuning the string too far over pitch without realizing it.)
If you find it difficult to get the strings in tune on both sides of the treble bridge, you’re not alone! There are a few common reasons why this can happen, and we cover those and their solutions in our blog article on Tuning the Treble Bridge. Once you’ve learned the tips, it gets a lot easier.
A knowledge of the dulcimer’s tuning scheme and of major scales, as well as a general understanding of treble bridge placement, will be of great help in the playing (and tuning!) of your instrument. This section applies to the traditional fifth-interval tuning. If you have a piano dulcimer (our model PD40), some of this information will not be relevant, and some will need to be adapted to your instrument.
Quite simply, a major scale is any series of eight notes which sound like the familiar “Do Re Mi Fa Sol La Ti Do." A major scale can begin on any note, and as long as the proper intervals between the notes are maintained, it will still sound like “Do Re Mi...." The note on which a major scale begins is called the “root” or “tonic,” and names the key you are playing in. For example, C Major consists of C, D, E, F, G, A, B and C.
The interval between the first note of a major scale (Do) and the fifth note of the scale (Sol) is called a “fifth”. The treble bridge of a dulcimer is precisely positioned to divide the strings that pass over it into two sections that sound notes one fifth interval apart. This means that if a string sounds “Do” on the right side of the bridge, then that same string will sound “Sol” on the left side. This fifth-interval relationship is clearly illustrated by singing the first two words of Twinkle, Twinkle, Little Star.

The hammered dulcimer is laid out in simple patterns of major scales. It is designed to provide easy access to the scales, or keys, most commonly used in playing traditional music: D, G, C, F, and A. The diagram below illustrates the tuning scheme for a basic 12-treble/11-basscourse instrument, and you just expand the pattern downwards for larger dulcimers.

The black dots in the diagrams show where major scales begin. These positions should be clearly marked on your instrument by white bridge cap markers. You play on both sides of the treble bridge and the left side only of the bass bridge.
To play a major scale starting on the bass bridge, follow the diagram below. Start at a white marker and play up the bridge to the next white marker. Then cross over to the treble bridge to the white marker that’s across from the note you started on, and continue up from there.

To start a scale on the treble bridge, follow the diagram below. Start at a white marker and play on the right side of the bridge. Play up to the next white marker, and then cross over the bridge and down to the same white marker you started on. Follow the numbers in order.

It will help to become familiar with these patterns and then try finding the common major scales listed below. Because the dulcimer is made up of a series of scales built one on top of the other, there are many notes that are repeated. This allows greater freedom of choice with playing patterns, and can help speed the tuning process
D Major: D E F# G A B C# D
G Major: G A B C D E F# G
C Major: C D E F G A B C
F Major: F G A Bb C D E F
A Major: A B C# D E F# G# A
You will probably encounter all sorts of different hammers. The single-sided hammers provided with some of our instruments are a good, well-balanced design and construction, suited to all styles of playing. They are made of bare hardwood and will give the loudest sound. We also make a leather-padded version, which gives a softer tone that is nice for mood and variety. Double-sided hammers, included with our solid-wood models, have both bare wood and leather covered playing surfaces on one hammer. You’ll find that hammer preferences are a very individual thing. Variations include double vs. single sided, padded vs. unpadded, types of padding, length of hammer, type of wood, shape of handle and hammering surface, weight, and balance. Try out as many as you can to see what suits you best. You can check out our hammer options here, but also feel free to experiment with other brands.
New players sometimes find it difficult to know what to focus their eyes on, but practice eases this fairly quickly. We find it helpful to focus on the black and white bridge caps where the strings cross the bridge, rather than on the strings themselves. The bridge caps are easier to see and provide location markers. In addition, tilting the top of the instrument toward you can improve your perspective somewhat. (The angle is purely a matter of preference.)
Hammers are generally held between the thumb and forefinger and the strings are struck about one inch from the bridge. Rock the hammers in your hands a few times to get their feel, then strike a sharp blow to a string, stopping the action as the hammer rebounds off the string. The striking motion should come from your wrist, not your elbow. Keep this up until you can easily get a single, well-pronounced note. If you hold the hammers a bit more loosely, put a little more pressure down with your thumbs, and don’t stop the action after the first rebound, you will find that they bounce off the strings in a sort of roll. This is a trill, a common embellishment.
A good way to start playing is to run through the major scales. You can find an introduction to the tuning scheme of the traditional hammered dulcimer here. Play with authority — use enough force to get the best tone from the instrument. Timid playing may make your instrument sound brash, thin, or indistinct. As you gain confidence, your accuracy and tone production will improve.
Although a great deal of instructional material is available for the hammered dulcimer, probably the most common means of learning a song is by ear. You don’t have to read music; just take a song whose melody is familiar and translate it into a hammering pattern. The easiest playing method is to alternate notes between the left and right hands, though you may want to deviate from this once in a while to keep your hands from getting in each other’s way. Start by taking a very familiar song, such as Oh Susannah and learn your way around the strings by picking out the melody with one hand. Simple tunes like these usually start on the tonic, or first note of the scale, of the key in which you are playing (D for D major, G for G major, etc.). If the first note is not the tonic, then try the third (“mi”) note of the scale. Next, play the tune while alternating hands. Try to develop coordination in both hands so that you can use either hand as well as the other. Experiment with putting in a few trills as you play.
With practice your reflexes will adjust to the distances between courses, the hammers will become comfortable extensions of your hands,and your music will gain rhythm and continuity.
Here are a few more embellishments might try to incorporate in your playing:
If you prefer to learn from a teacher and don't have someone local to you, we recommend the online Hammered Dulcimer from Scratch course developed by Mary Lynn Michal and Ken Kolodner.
There is so much to say on the subject of humidity and dryness that we've written a long article about it, as well as a couple of shorter informational sheets, and we strongly encourage you to check those out. Basically, with too little moisture in the air, your dulcimer is at risk of cracking, and with too much moisture, the soundboard could swell and warp. But don't worry - there are relatively easy ways to monitor this and to keep the humidity in a safe range!
Blog article about keeping instruments safe from extremes of humidity and dryness
Be sure to guard your hammered dulcimer from extreme changes in temperature. Keep it out of direct sunlight, hot cars, freezing attics, etc. It can be surprising how fast a car interior can heat up to dangerous temperatures. On an 80 degree day, even if you're parked in the shade with the windows cracked, it can take less than half an hour for the interior to get hot enough to soften the instrument's glue. It may not show right away, but once the glue is softened, the tension of the strings will gradually pull the instrument apart. A good rule of thumb is that an environment that would make a human uncomfortable will also make your dulcimer uncomfortable.
It is also important to pay attention to the humidity in the dulcimer's immediate environment, and you can read more about that above.
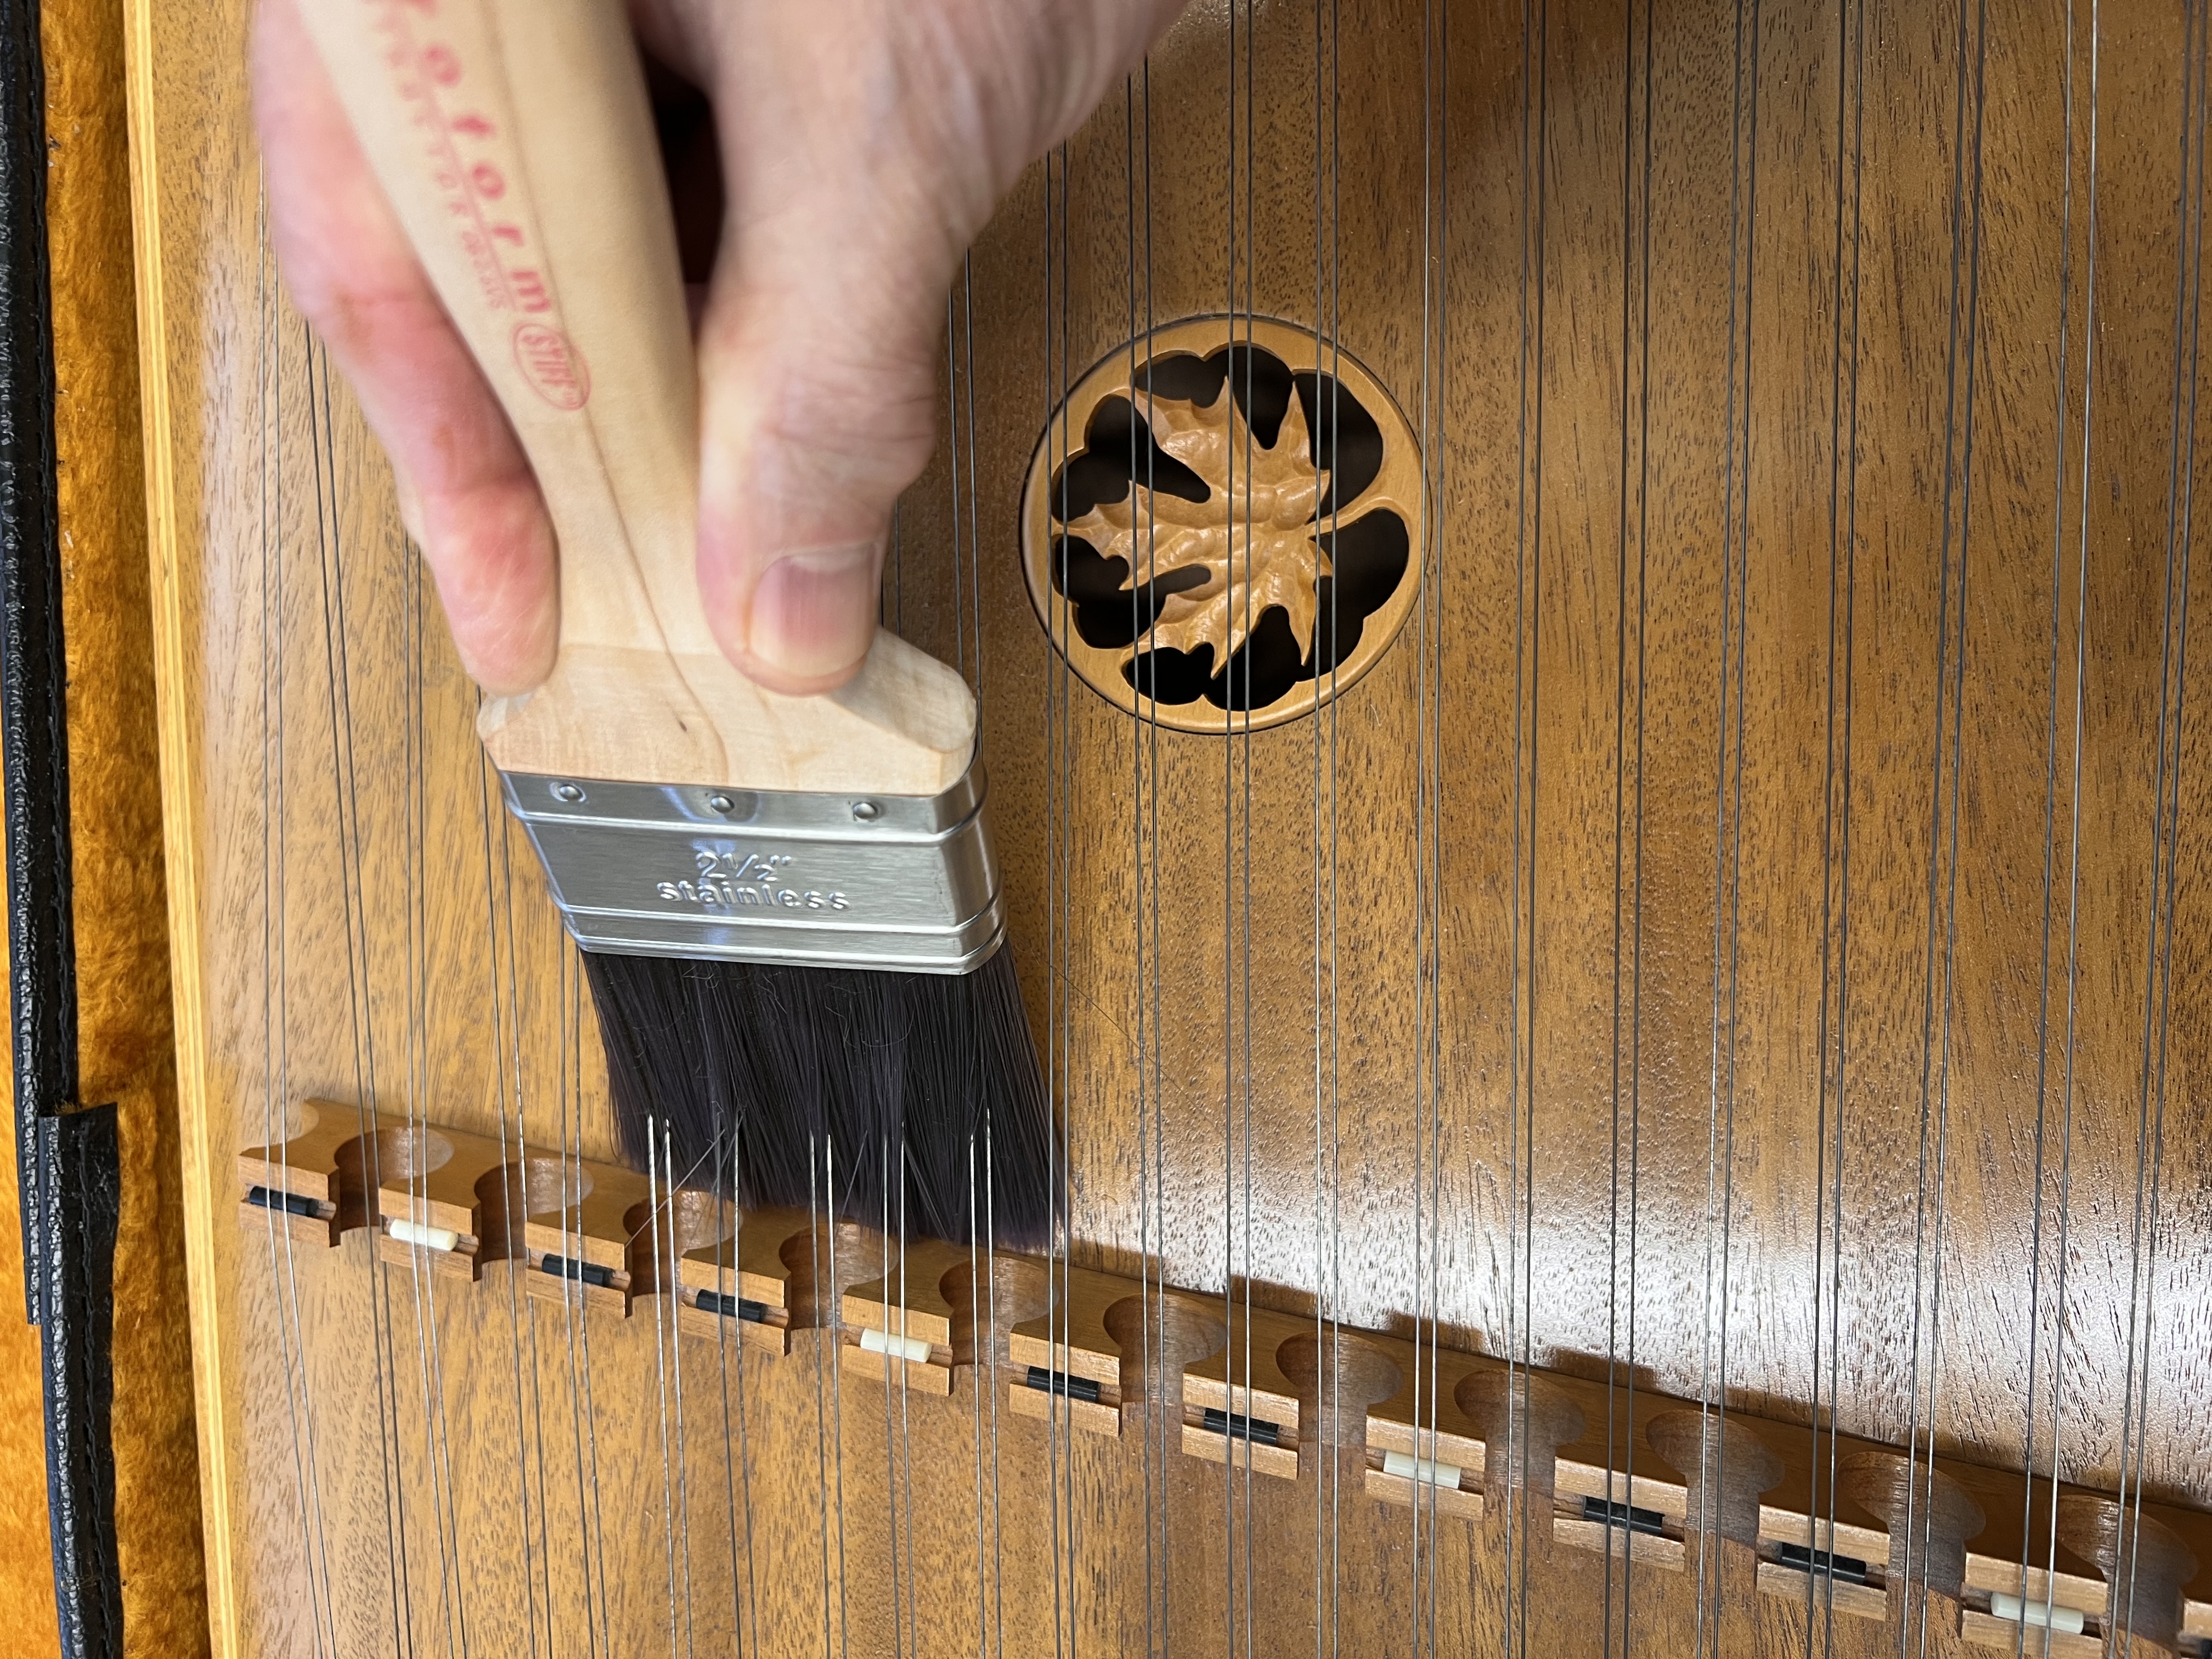
Our dulcimers are finished with several layers of clear nitrocellulose lacquer, which doesn't require polishing or conditioning to keep it looking nice. Aside from paying attention to the humidity (see above) and keeping your dulcimer out of direct sunlight, the best thing you can do to keep it in good condition is to dust it. Our favorite dusting tools are compressed air and stiff paintbrushes. A small artist's paintbrush can work well for getting around tuning pins, and a wider house-painter's brush can be really effective for reaching the soundboard through the strings.
If you encounter stubborn dust or anything sticky, a cloth slightly dampened with water or mild glass cleaner should be enough to get it off.
We don't recommend using instrument or furniture polish or oils, as certain types can interfere with the ability to do future repair work on the lacquer finish. However, we have successfully tested one type of furniture oil called Tibet Almond Stick, which can safely be used on your Dusty dulcimer to help hide dents and scratches in the lacquer. See the Anti-Aging Kit for more details.
Though hammered dulcimer strings can potentially last for years without needing to be replaced, random breakage can and will happen, so every dulcimer owner at some point learns to replace strings. Single replacements can be ordered through our website as needed. If you want to be sure a missing string doesn’t ruin a gig, consider keeping a full or partial string set on hand.
Our Hammered Dulcimer Strings page has lots of information on ordering and replacing strings.
If you hear a raspy, buzzing sound when you play your instrument, the most likely cause is a string that is resting too lightly on the side bridge, causing it to vibrate against the bridge when struck. You can find out by locating the buzzing string and pressing down on the string right next to the tuning pin while you strike the string. If the buzz is gone, you've found the culprit and can fix it by loosening the tuning pin and re-winding it while pushing down on the string next to the pin. This will help it to wind down towards the soundboard and give the string a solid contact point with the side bridge.
Some of the strings at the upper end of the bass bridge have a steep angle and it’s difficult to wind them low enough to make solid contact with the side bridge. Since these strings are not played on the right side of the bridge, you have the option of rewinding them higher up so that they are fully above the side bridge and make no contact at all. (This will not work for the treble bridge strings that are played on both sides of the bridge because it throws off the tuning.)
It is also possible for the treble or bass bridge to have been knocked out of position, which can cause the strings from the other bridge to buzz against that bridge where they pass through the holes. This can also be fixed, but you want to be very careful not to break or bend the bridges in the process of moving them.
If none of those things seem to be the cause, try pushing on one or both of the round sound hole inserts while you play. If one has come loose, it could be the source of a buzz.
The most frequently-mentioned source of tuning frustration is with the treble bridge, where it can sometimes be difficult to get the notes in tune on both sides of the bridge. There are a few common reasons why this can happen, and we cover those and their solutions in our blog article on Tuning the Treble Bridge.
Our padded cases work quite well for protecting your instrument from dents and dings in most transport situations. For car travel, it's best to either lay the dulcimer bridge-side-up on top of your other gear, or stand it up on the rail with the case handle facing up, braced so it won't fall over. If you will be driving a distance with the sun shining on your dulcimer, you can put a space blanket over it to reflect some of the heat. Make sure to read the Temperature section above for more information about the dangers of leaving your instrument in a parked car on a warm day.
Flying with your dulcimer can be a more challenging proposition. Most likely you will not be able to carry it on the plane, and the regular soft or chipboard case will not be enough to protect it as checked baggage. If you plan on flying with it a fair amount, you might want to invest in a rigid flight case, and there are companies who specialize in making custom flight cases. We've also heard that some trapezoid-shaped archery bow cases and bicycle flight cases might fit particular dulcimer models.
For occasional trips, it's often easier to pack the dulcimer in a cardboard box and either ship it to your destination or check it with your luggage on the plane. You'll need a box big enough to fit a few inches of packing peanuts or bubble wrap all the way around the dulcimer. Make sure it's packed snugly so it can't shift around and so the dulcimer itself isn't touching any part of the box. You can go to a packing service to find a box, or think creatively about what local businesses might have extra boxes in the size you need.
If you are repairing or maintaining a Dusty Strings dulcimer, we can most likely help you find the parts you need. Some of the more commonly-requested items like bridge caps can be found on our website, but feel free to call us if you need something you don't see there.
If you are building your own dulcimer, we have high quality zither pins available for sale, but unfortunately we don't have the resources to advise you on design or to provide plans or other parts, such as bridges.
